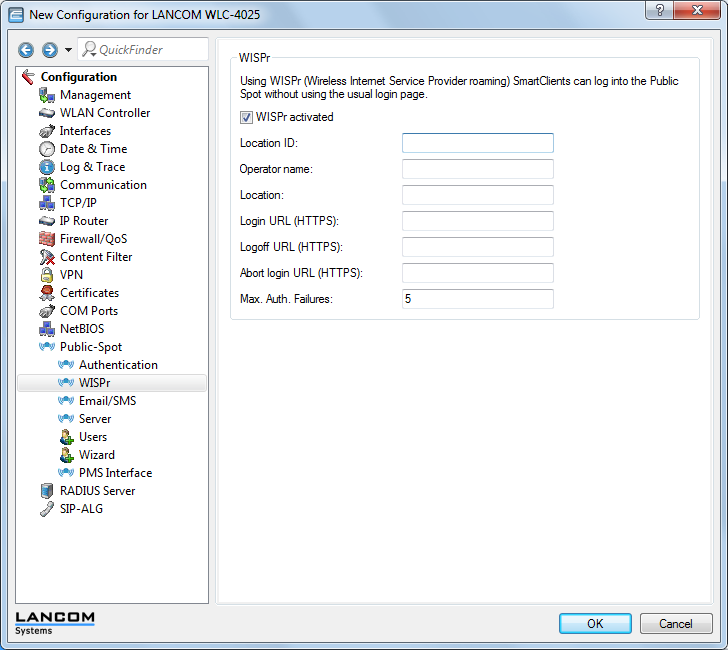
Configure the WISPr function of your device in the menu .

In this window you have the following options:
- WISPr activated: Enable or disable the WISPr function for the device.
- Location ID: Use this ID to assign a unique location number or ID for your device, for example, in the format isocc=<ISO_Country_Code>,cc=<E.164_Country_Code>,ac=<E.164_Area_Code>, network=<SSID/ZONE>
- Operator name: Enter the name of the hotspot operator, e.g., providerX. This information helps the user to manually select an Internet service provider.
- Location: Describe the location of your device, e.g., CafeX_Market3. This helps to better identify a user in your hotspot.
- Login URL (HTTPS): Enter the HTTPS address, that the WISPr client uses to transfer the credentials to your Internet service provider. Any external URL can be entered or the Public Spot itself. If the Public Spot should authenticate users using WISPr, enter the URL in the format https://<Device-FQDN>/wisprlogin. For "wisprlogin" in the example, any freely defined path can be used.
- Logoff URL (HTTPS): Enter the HTTPS address that a WISPr client uses for logging off at your Internet service provider. The same rules apply as for the login URL.
- Abort login URL (HTTPS): Enter the HTTPS address to which the device forwards a WISPr client if authentication fails. The same rules apply as for the login URL.Note: The three URLs must be different, if the Public Spot is used in the device domain, for example:
- Login-URL: https://<Device-FQDN>/wisprlogin
- Logoff-URL: https://<Device-FQDN>/wisprlogoff
- Abort-Login-URL: https://<Device-FQDN>/wisprabort
Finally, for test purposes, you can also configure an URL with IP addresses. In a production system, the client will check the FQDN of the certificate!
- Max. auth. failures: Enter the maximum number of failed attempts which the login page of your Internet service provider allows. If the Public Spot is used, the Public Spot rejects further login attempts by the specified client after this number of failed attempts.
